Reaching Max Austenizing Temperature

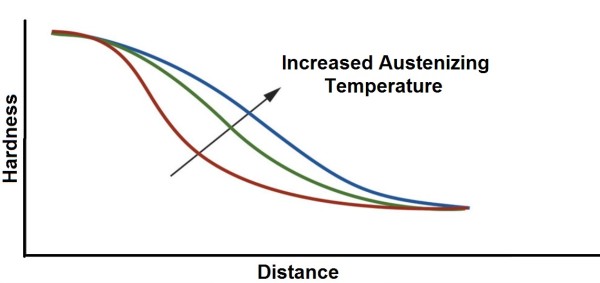
How do you know when a part reaches its maximized Austenizing temperature? That’s the knowledge separating the flame hardening pros from the amateurs. The length of the heat cycle is affected by several factors, but the most important one is the flame heads. It All Starts With Flame Head Design, Going With The Flow In Flame Head Design That’s because flame cones and the flows of fuel gas and oxygen determine the intensity of your heat. And the intensity of your heat, along with the material you’re heating and the temperature it requires, determines the ideal cycle length for your part.
Old-school flame hardeners might know a material so well they can tell by the change in color during the heat cycle when the part is ready for quench. But rather than leave it to subjective human judgment, we at FTSI employ a couple of tools to make sure we’re getting the exact temperatures necessary for achieving the hardness levels and depth that are needed.
The first is our own large database of past flame head designs. For each part treated by a particular flame head, we know the optimum mix of fuel gas and oxygen needed to take the part to Austenizing as efficiently as possible. When a customer comes to us with a brand new project and needs to determine the hardness pattern for a part, we start with an analysis of the part, the design of the flame head that takes into account variations in thickness and required Rockwell hardness levels, and then build the equipment that can run on prototypes until we achieve exactly the hardness pattern needed in the field.
By virtue of our long years in the business, we know a lot about how hot a flame can burn and for how long to Austenize a great variety of materials and geometries. That’s how we can help customers develop hardness patterns efficiently because our trial-and-error begins within a small window of parameters already known to us.
Once a hardness pattern is identified and the part is ready for production, we provide the second tool to help ensure the customer is always getting the same pattern each and every time: a flow control mechanism, and an infrared pyrometer. For the purposes of this blog, we’ll just look at the pyrometer and tackle flow control in a later post.
We use Williamson short-wave infrared pyrometers to measure the temperature at the surface of the part. These pyrometers are installed in a specific location to give the most accurate reading. They have the advantage over thermocouples and RTDs because they do not require direct contact with the part, only a clear and direct line-of-sight to the part.
Williamson explains their technology this way: “Every object emits infrared energy proportional to its temperature. Hotter objects emit more energy; cooler objects emit less energy. Infrared pyrometers collect the infrared energy emitted by an object and convert it into a temperature value. The amount of energy collected by a sensor is influenced by the emissivity characteristics of the target and the transmission characteristics of any intervening optical obstructions between the sensor and the measured target. The influence of these factors varies significantly at different infrared wavelengths. Selecting a pyrometer filtered at an appropriate wavelength makes all the difference in achieving accurate readings. Emissivity is a term used to quantify a material’s tendency to emit infrared energy. It is related to the reflective and transmissive characteristics of the material and is measured on a scale of 0.0 to 1.0. In practical terms, emissivity is the opposite of reflectivity. For example, a highly reflective surface like aluminum has a low emissivity of 0.1, while a dull surface like refractory brick has a higher emissivity of 0.9. Intervening optical obstructions such as steam, water vapor, flames, or combustion gasses have the potential to interfere with the amount of energy that is measured by the sensor.”
Pyrometers come in a wide variety of specifications depending upon the application, so we choose the Gold series pyrometers that offer a lower error reading of emissivity and optical obstruction. Williamson’s emphasis on wavelength to deal with potential emissivity or obstruction errors give us consistently reliable and repeatable measurements of our heat cycles. That, coupled with the discovery process during which we determine what flows to use to achieve Austenizing within an established time frame, gives us reliable methods to use time and again making sure that quality specifications are reached for every flame hardened part.
Customers usually ask for pyrometers to be installed, believing these provide their quality control mechanism. I hope by now you understand that surface temperature measurement is but one tool we use to ensure there’s a quality outcome every time the part is flame hardened. The best quality measurement, in our view, is a meticulous and well-documented discovery process that produces the necessary hardness pattern and provides the flow and cycle length variables to ensure the right levels and depth of hardness every time. That’s what professional flame hardening can do for you, and that’s one of the biggest values we provide for all our customers: determination of the right length and flows of the heat cycle, and methods to ensure it is repeatable every time, no matter who operates the flame hardening equipment.
Many customers come to us during their research phase to have us help them establish their production-level hardness patterns. We can help you do this, and we can build the equipment to flame harden your parts once they are in production. For more information about Austenizing temperature email me at mark@flametreatingsystems.com or call 919-956-5208. Happy heat treating!
B22: We would like to know your opinion.


