The Secret Sauce of Heat Treating

Why would anybody write a blog about heat treating? I mean, it’s just a means to an end. What you really want is a production line that’s producing parts according to hardness specifications so that in the field, the part stands up to repeated abuse and doesn’t fail before its time. For many folks, heat treating in general, and flame hardening in particular, is one of those backroom processes where it’s just better not to know. Like making sausage. Or even worse, when you DO try to find out how to make the sausage, the sausage shop won’t tell you what’s in it.
That’s why I’m writing this blog. There’s a lot of missing and mis-information out there about heat treating in general and flame hardening in particular. Plus, more longtime heat treating technicians are retiring and taking their experience with them. So the time has come for a blog to get some of that hard (no pun) –earned knowledge out to everyone who needs to heat treat a part.
Let’s start with the drawing and hardness specification for your part. You get handed that and the responsibility for figuring out how to meet the specs for the hardness depth and pattern. Where do you start? The most reasonable place is starting where you are. You look at what processes you already have that could meet the spec. Maybe your company already uses inhouse heat treatment processes, either carburizing or induction or flame. It’s natural not to want to reinvent the wheel even, or especially, if you have to harden it. But you quickly find out that parts is NOT parts, and one process makes more sense for one type situation than another.
For example, let’s say your hardness spec for a gear uses 1018 steel and you’re already running a carburizing furnace and think you could just add this new part to the existing production line of the oven. Sounds good. But the oven will have to be recalibrated to handle this part at the proper temperature, which will take time to do, and hardening the entire gear in the oven runs the risk of greater distortion in the pattern, so you would need to mask the areas that you don’t want hardened. So what you might save in material costs with cheaper steel you just lost in increased time and material handling, and at the risk of distortion when the masking isn’t done properly.
Your ROI calculation might actually improve if you started with a higher carbon steel, such as 1045, and bought a flame or induction solution to create exactly the hardness pattern and depth of your specified areas. If you have extremely high volume and only one part to set up, induction probably produces the better ROI. But if you have lower volumes and/or you need the flexibility to set up hardening for several different parts, you should look at flame.
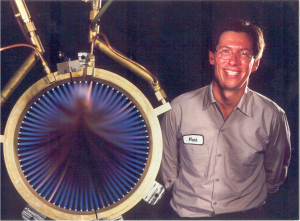
I’ve been in the heat treating and flame hardening business for over twenty years, and before that I was working with my dad who started this company over forty years ago. We’ve helped dozens of customers wrestle with these questions and more, and in this blog I want to start sharing some answers about the “secret sauce” of flame hardening, and not just answers but also some key questions that folks need to know they should ask when they are analyzing heat treating options for their production lines. I guess what I’m hoping to do with this blog is create a place for conversations between novice and longtime heat treater, idle browser and serious production-driven decision maker alike. Let’s capture and share as much knowledge about heat treating as possible so it can be passed on to and improved by a new generation of engineers.
So in my future posts, I’ll be sharing answers about solving heat treating issues like cracking or distortion and questions you should ask early in the design process. If you want to ask me to cover a specific heat treating topic or anything related to flame hardening as well, email me at mark@flametreatingsystems.com or call 919-956-5208. Happy heat treating!
B1: We want to know your opinion.


